Welcome to my bonsai blog!


Welcome to my bonsai blog!

Look around! Use the Search box, browse the Archive, and leave comments. Click on any picture to enlarge it.
I would be honored to have you follow my posts. There are two ways to do that.
-- If you have your own blog, use Join this site
to have notifications of my posts sent to your blog's reading list.
-- If you don't have a blog,
use Follow by Email: new-post alerts will be sent to your email address. Pictures aren't included; that's just how Blogger does it. For the pictures you come here!
Fora and vendors that I can recommend from experience are listed in the right sidebar.
For more about the ads, and just why I enabled them, please see "About the ads," below.
"And the LORD God made ... trees that were pleasing to the eye ..." Gen. 2:9, New International Version.

"Bonsai isn't just something I do; it's part of what I am." Remark to my wife and daughter.

Sunday, December 19, 2021

NOT Stronger at the Broken Place

(Members of the Ft. Wayne Bonsai Club will have seen this material already, with some different wording, in a recent "Stuff from Steve".)

 Stronger at the broken place. Have you heard that expression?

It comes from the world of medicine, and has to do with the healing of a broken bone. If the broken ends of a bone are close enough to each other and the bone is otherwise healthy, those broken ends will begin to knit together. New connective tissue is laid down between them and then impregnated with calcium, becoming new bone and filling in the break.

And what often happens is that even more bone is added than was originally there. When that occurs, the result is that the healed bone becomes, literally and truly, stronger at the point where it broke than it had been before.

The expression is also used metaphorically, especially of relationships. I know very well one couple who, I am sure, would not hesitate to say that their marriage was once badly broken but is now stronger than it was before. (And their next anniversary will be their forty-fourth.)

The expression can be true of bones and marriages. But, alas, it is not true of trees.

When a woody branch or trunk breaks, the break can heal over if the broken ends are immediately aligned and immobilized, and sealed to keep out pathogens, excess moisture, and air that could cause an embolism in the water-conduction channels. But the thing to remember is that the broken wood itself will not heal. Broken living wood will never knit together as broken living bone will.

What happens is that the broken cambium and phloem layers will heal and repair themselves if given the chance. Then the cambium will start laying down new wood across the break, bridging it. Little by little that new wood will build up, thickening and strengthening the trunk or branch at that point. But underneath, the break in the wood is still there and still broken. The tree will wall off the break by chemical means so that no infections can invade the rest of the tree from it, and keep growing. But the break will always be there, down inside, and - the thing to keep in mind - as a result, a weak point will always be there.

I got an unexpected demonstration of these facts earlier this year. I did a live styling demo using a bunjin lilac at the 2018 Cherry Blossom Festival. People nearby heard the loud Crack! that announced that I had, shall we say, overestimated the flexibility of mature lilac wood. The trunk had broken more than halfway thru.

I immediately realigned the trunk to close the break, slapped on zip ties to hold it, covered the break with cut paste and vet bandage, and immobilized the trunk with sturdy wire. Here’s a picture of the repair job, taken the next spring.

The wire is supplying most of the force to keep the break closed.
The vet bandage lets the bark "breathe".

The tree leafed out and grew well the next year. In spring 2020 I removed the wire, vet bandage and zip ties. The new wood that had been laid down across the break to that point was strong enough to support the trunk. The blue ellipse marks the break site.

Spring 2020, almost two years after the break. Enough new wood has been
laid down across the break to support the trunk in normal conditions.

Close-up of the break site, spring 2020. You can see some of the swelling that
accompanies the healing-over process.

I don’t know if I forgot, or simply didn’t fully realize, that broken wood doesn’t knit and the tree was still weak at the break site. In any event, I didn’t apply any new reinforcement. That was a mistake. I discovered my error this spring, 2021, when a storm with strong winds came thru one nite. I went out the next day and found that the new wood at the break site hadn’t been strong enough to stand up to the wind. It had snapped, letting the original break in the trunk open up. By the time I found it, it had been that way for at least twelve hours. I immediately closed the break, fixed the trunk in position with a screw, and slathered cut paste liberally all around the break. But the damage was done. Within a week and a half the tree looked like this. It did not recover.

You can see the cut paste I applied after I repositioned the trunk.
Sadly, my efforts were too late.

So remember: when living wood breaks, it will not knit back together. The tree, given proper care, will bridge the break and proceed to lay down new wood across it. A time may come when enough new, healthy tissue is laid down that you will hardly be able to see that anything was ever damaged. But the tree will always be weak at the point of the break, and you will need to remember that.

:-|  :-|   :-|

Friday, October 8, 2021

Reworking a Ponderosa's Apex

      Regular readers have seen pictures of this tree before. It's a ponderosa pine, Pinus ponderosa, collected by Andy Smith in 2017. I bought it from Andy in August 2019 and styled it with his assistance. It was repotted in the spring of 2020, and grew well for the rest of that year and into this one. Here's a picture after repotting. Please forgive the cluttered background in some of the pictures.

For a size reference: I'm just over 6 feet tall, or 184-185 cm.

Notice where's the tree's apex is, and how the trunkline sweeps around in a single arc, similar to a letter "C" or a "(" parenthesis sign. I was never very happy with that simple arc. It was too plain, too regular for my taste, even with the movement just above the base; too much like a "stick-figure" tree. 

I spent many hours studying the tree, trying to decide what I could do increase the visual interest of the trunk. The tree is about 45 years old (estimated) and perhaps my most valued. You can see its girth in the picture. Most of the trunk could not be changed without using techniques with which I am not familiar enough, and I had no wish to take a chance on ruining its image. I finally concluded that a change in the direction of the apex would increase the visual interest as I wanted, would enhance the tree's image, and was within my skills. A little consultation with a professional helped me decide.

Over the last several months of subscribing to Bonsai Mirai Live, I have learned a good deal about the annual phases of growth in temperate-zone plants. As I described in an earlier post (you can see that post here), a temperate-zone tree such as a ponderosa spends the first part of the growing season producing foliage to supply itself with metabolic fuel. Then, at a certain point in the season, production of new foliage shuts down and the tree's resources start to be directed into production of new vascular tissue, including sapwood and root tissue.

In pines, the start of this transition is signaled by the shedding of three-year-old needles. The vascular-growth phase is also the second-best time of year for major structural work on a temperate-zone tree, so the shedding of old needles signals the start of this work window in a pine. My ponderosas started shedding old needles in mid-September.

My goal, as I said, was to introduce a change of direction in the upper trunk and orient the apex to the left. This picture shows the upper part of the tree after the old wire had been removed. Some of the branches had relaxed a little, but not a lot; they had been wired for two years.

In spite of the angle of the picture, the apex was still oriented to the right.

One of the top branches had to be removed and an old branch stump cut off before the change could be made. 

A single slanting cut took off the unneeded branch and the old stub.
Cut paste was applied due to the size of the cut.

New copper wire was put on and the bend was made just above the new cut. I made the bend as severe as I could without risking a break - severe enough that a few small tears opened in the bark of what was now the outside of the curve. That was actually OK; they will heal (with a little cut paste to help), and they told me when to stop bending. Several of the top branchlets had to be rolled so that their former undersides wouldn't become their upper sides and be exposed to direct sunlight to which they were not acclimated.

The new apical structure will need a few years to fill in well.

The tree is due for repotting next spring. At that time, its planting angle will be be adjusted and the front rotated to show more of the base. I can't be exactly sure of the new planting angle and new front until I actually repot the tree, but the next picture gives you a pretty good idea of what each will be.

Finished for now. I like this movement and image better.

The orange arrow shows the new apex. As it develops and fills in, I will probably introduce a small movement back to the right, at the very top. I'm going to do what I can to encourage a new bud to break near the base of the branch to the right of the apical area (yellow arrow). If that happens I'll be able to shorten that branch. Adjustments to various other branches will also be needed, given how much of a change I've made in the tree's overall design and character.

Bill Valavanis and Ryan Neil have both recommended that I move this tree out of a rectangular pot; possibly into a round, possibly into an oval if I decide to include that little top fillip I mentioned. I have a large mica oval that will serve until I can find an appropriate ceramic pot for this tree.

For now, I'm giving it a good regimen of several kinds of solid fertilizer, to be sure it has a good supply of nutritional "building blocks" as it recovers from all the pruning, wiring, twisting and general manhandling I did to it!

:-)  :-)  :-)


Monday, September 13, 2021

A Few More Goodies From This Year's Mid-America

     Those who have been to the Mid-America Bonsai Exhibition know that when you enter the Regenstein Center thru its front doors, you pass down an entrance hall to the doors of the exhibition space itself. This year, someone decided to put a row of bonsai down the center of the entrance hall, giving the visitor a foretaste of what waited for them at the end. I think it was an inspired idea!

Looking down the entrance hall toward the Phillips Exhibition Center.

Here's a closer look at one of the trees in the center space (normally a pool), the very first one you encountered. Its trunk just above the nebari is as thick as my thigh. (And I'm not a little guy.)

Trident Maple (Acer buergerianum) with its Hosta spp. companion plant.


Besides the awards given by the Midwest Bonsai Society at the guest master's behest, the American Bonsai Society also gives an award for the best bonsai using a native North American species. This year's winner is this Rocky Mountain Juniper (Juniperus scopulorum); the owner (and, I presume, artist) is Mark Karczewski.

A superb design job, combining harmony with dynamism.

OK, real quick: when you hear "California redwood", what do you think of? The tallest tree species on the planet, right? Would you believe a shohin California redwood, less than nine inches high from the soil?

California redwood, Sequoia sempervirens, shorter than my handspan.
Very nicely designed. Owner is Steve Carini.


A small collection of pots was on display, protected by clear plastic cases. The owner, Tim Priest, told me that these pots were the work of a certain Japanese potter who passed away in 1970. Since his death, no one has been able to reproduce his glazes.

The glazes on these pots are now unique.
A closer look at two of them.

The largest of these pots (at the extreme right above, and below) has another unique characteristic. Most Oriental potters stamp the bottom of a pot with an identifying mark known as a "chop"; sometimes there will be two. This pot, for whatever reason, has eight - count 'em, eight - chops on its undersurface! No one is sure why now.

(What's your guess as to why this pot carries so many chops?)

:-)  :-)  :-)


Monday, September 6, 2021

A Tale of Two Ponderosas

 (With a nod to Charles Dickens.)

     When you first enter the exhibition hall where the Mid-America Bonsai Exhibition is held, your eye is guided straight through the room to a double tokonoma which holds the Best of Show and Best of Show Professional. This year was the first time in roughly 30 years of attending that I saw two trees of the same species in those places of honor. Two ponderosa pines (Pinus ponderosa), both yamadori.

The Best of Show and Best of Show Professional with Tim Cox

In the picture is Tim Cox, owner of the Best of Show tree. The Best of Show Professional belongs to Andy Smith of Golden Arrow Bonsai, bonsai professional and yamadori collector. Both trees were collected in 2017, and, I was told, in the same general area and just a week or two apart. Andy obtained his in the course of his regular collecting. Tim, with his son’s participation, collected his under Andy’s guidance. (I didn’t hear how old either tree is and didn’t think to ask.)

Besides both being ponderosas and fairly large, both are obviously mature trees, are obviously in good health, and have been in bonsai training for about the same amount of time. Both have excellent trunk taper, and I would call the basic style of each slanting, but with the apex coming back toward the base almost enough to qualify the tree as a moyogi (informal upright.)

Tim Cox's tree, Best of Show


Andy Smith's tree, Best of Show Professional

But notice also the many differences between them! Tim’s has a more serene look, with few breaks in the canopy’s silhouette and relatively little deadwood. Andy’s tree has a more dramatic, rugged appearance, with almost all the foliage to one side of the tree’s base and noticeably more deadwood - deadwood that hints strongly at adversities the tree has overcome. They even face opposite directions!

(By the way, what looks like Spanish moss hanging from Andy’s tree is not an example of his well-known taste for whimsy, but is another epiphytic moss which in fact grows on trees in the Black Hills.)

Notice also the differences in the pots. Tim Cox recounted to me the hours he spent on the phone with potter Ron Lang, working out details of his pot: the dimensions, the understated rim, the slight convexity of the walls, the vertical corner lines – everything! I think the time and thought that they both put in paid off: I have not often seen a finer pot, or one so suited to the tree it displays. The black slab for a stand works perfectly with the pot and the tree.

Follow me on a brief rabbit trail here. You may notice that Tim’s pot is glazed, with what I would call a "semi-muted" glaze. In traditional bonsai display, a conifer always goes in an unglazed pot - always. But I think this composition works anyway. I agree that an unglazed pot is usually best for a conifer: conifers are not loud, showy trees, and many glazes would call attention to the pot and away from the tree if used with the quiet colors of a conifer. But I personally have no quarrel with the use of muted glazes, in quiet colors such as green and blue, with coniferous bonsai. The only thing I would change in this composition would be to make the glaze a little more muted. - OK, end of rabbit trail.

Andy’s pot is unglazed, and also works excellently well with the tree it houses. The dark color of the clay body harmonizes with the tree’s color tones, and anchors the whole composition well. And the shape of the pot is right for this tree, right down to the spiky scalloping (sorry, I don’t know what else to call it) around the rim which mirrors the spikiness of the deadwood. And the colors and character of his stand work well with his tree, as Tim’s black slab works with his.

Two fine collected trees of the same species, with many similarities but almost even more differences. I haven’t seen earlier pictures of either tree, but we can do some “reverse extrapolation” in our mind’s eye and get some idea of what each tree looked like when it was collected. I’m sure they were quite different even then. What I ask you to take away is this: each artist studied his tree, respected and accepted the features and characteristics it had to offer, and then worked with those to produce a superb and show-winning bonsai.

********************************************************************

For the past year and more I have been doing the next best thing to taking bonsai classes: I have been a regular learner and participant in the weekly teaching events, of one sort or another, on Bonsai Mirai. Between learning more about bonsai every week and putting what I learn into practice on my trees, I have not had much time for writing about bonsai! (Some health issues have also interfered somewhat.) But I'm ready to try some writing again, along with everything else, and hope people find it worth their while to read it. - Steve Moore

:-)  :-)  :-)


Sunday, November 22, 2020

Entry Display at Wigert's Bonsai

      In February I wrote a post about a Christmas visit to Wigert's Bonsai, thanks to the generosity of our daughter Kira and her husband Trent. I included as many pictures as I reasonably could, because sometimes, a picture really is worth 1,000 words when it comes to getting across what a place is like. 

But there was one picture I had not taken, and, I discovered, no one else in our party had either: a picture of the display that greets visitors when they first turn into Wigert's driveway. That display is quite eye-catching, and I was kicking myself, figuratively speaking, for not having thought to get a picture. (The display is some distance from the rest of the establishment.)

Then, two months ago, my wife visited Kira and Trent again, and was able to get a picture for me. (Domo arigato, sweetie.) Here is her picture:

Entrance display at Wigert's Bonsai, North Ft. Myers, Florida.

The main tree, its roots growing over the large chunk of reef rock, is a Ficus, presumably F. microcarpa. The shrubs flanking it on either side are Podocarpus (I don't know the species). The bamboo makes a fine backdrop, in my opinion.

Here's a closer view of the main tree:

Root-over-rock Ficus, presumed F. microcarpa. The picture was shot late in the afternoon,
which makes for the strong interplay of light and shadows.

I suppose that, technically, this tree is not a bonsai, since the tree-and-rock composition is not in a container or on a slab. But that really doesn't bother me in this case: it's a still a fine example of the bonsai practitioner's art!

To jump to my February post about our visit to Wigert's, click here.

:-)  :-)  :-)

Sunday, November 15, 2020

"HOODAH THUNKITT??"

     That could have summed up my reaction a few weeks ago, when I heard Ryan Neil say that trees and shrubs photosynthesize through their bark as well as their foliage. They don’t photosynthesize as much through their bark, but they still do it. This has a number of implications for fall and winter care of temperate-zone trees.

(Readers of the Fort Wayne Bonsai Club newsletter has already seen this in my latest Stuff from Steve.)

First, a little botany review. At some point in late summer or fall, temperate species stop producing new foliage and direct all their resources to two purposes: producing more vascular tissue (bulking up), and storing carbohydrates – sugars and starches - for the following spring’s growth push. Just when they make the transition varies from species to species; for example, some maples (Acer) switch over as early as late July, while Austrian pine (Pinus nigra) does so in early-to-mid September. But they all make that shift.

Inside every plant cell is a structure called a vacuole, enclosed in a semipermeable membrane. Some plant cells have more than one, and fungi and some microorganisms also have vacuoles. However, to keep this discussion simple, I'm going to stick to a scenario of a plant cell with one large vacuole. Here is a diagram. Notice that the vacuole can, and often does, take up more than half the space inside the cell.

"V" marks the vacuole.


During spring and summer, the vacuoles in temperate-zone plants contain water and not much else. But as the growing season progresses, sugars and starches for the next spring are stored up, dissolved, in the vacuoles. At first only what is left over from foliage production and other metabolic needs is stored. Once the plant - for our purposes a bonsai or bonsai-in-the-making - makes the late-season switchover described above, carbohydrates storage goes into high gear.

And while stored in the vacuoles waiting for spring (for any who may not know) those carbohydrates serve another function: antifreeze! Water that contains anything else in solution freezes at a lower temperature than pure water – sea water freezes at 29 degrees F (1.6 degrees C), for example. And the greater the concentration of solutes in the water, the lower the temperature at which it freezes.

Trees and shrubs continue to produce and store photosynthates as fall progresses. That’s true for deciduous trees, even after leaf fall, as well as for conifers, because of the aforementioned photosynthesis in the bark. Production and storage slow down as temperatures drop and day lengths shorten, but they don’t stop. In fact those processes don’t stop altogether even when ambient temperatures are well below freezing because of residual heat inside the tree’s tissues. It's true that for all practical purposes, trees can be considered dormant at temperatures below 42 degrees F (5 degrees Celsius); but carbohydrate storage in the vacuoles continues past the winter solstice, albeit at a very low level.

Remember that the higher the concentration of dissolved substances in water, the lower the temperature at which that water freezes. This means that as fall goes along and more and more dissolved carbohydrates are stored in a tree’s cells, the more cold-resistant that tree becomes and the deeper the cold required to kill it. As a matter of fact, the strengthening of the tree’s cold-hardiness stays pretty closely in step with the falling temperatures! Temperatures around here in mid-December are colder than in mid-October (all else being equal), but by December the tree has more “antifreeze” stored up in its cells than it had in October. Temperatures in the northern hemisphere usually bottom out in mid-January (give or take a bit) and by then carbohydrate concentration in the vacuoles has reached its strongest. (To me, the elegance of the whole setup demonstrates the sheer skill of the Creator.)

What does this mean for fall and winter care of bonsai and bonsai-in-the-making?

First, if a tree needs any fall pruning or working, do it as soon as possible after the transition away from foliage growth has begun; make sure not to do it before that. You want the tree to have as much time as possible to heal over the trauma, but you also don't want to interfere with production of leaves and needles - primary photosynthesizing surfaces – until that production stops naturally.

Second, keep up light fertilizing through the fall, and even (very light) into early winter. The tree will still benefit by it. And the same goes for water: keep the soil at least moist unless and until it freezes. (For any who don't know, freezing won’t harm a temperate tree’s roots; neither will staying unfrozen. But do try to avoid alternating freeze-and-thaw.)

Third, and contrary to some conventional wisdom, it’s best to give all your trees some light throughout the cold months, even your deciduous ones. Remember that they can photosynthesize through the bark. At the same time, if you can’t give your deciduous trees any light during the winter, you won’t lose them as long as you can keep them below 42 degrees F (5 C.). They just won’t get off to quite as strong a start in the spring.

One more thing: please remember that all of this applies only to temperate-zone trees. Tropicals are another ball of wax – or should I say “of bark”?

:-)  :-)  :-)

Thursday, April 23, 2020

From the Greatest to the Least

     The ponderosa featured in my last post is not only the largest of my pines, but with an estimated age closer to 50 years than 45, it is also the oldest and most mature.

Here is the youngest and the smallest. I haven't yet identified its species.
One year old. The trunk is about twice as thick as a pencil lead.

About a year ago, my wife accompanied our oldest daughter, who is a skilled semi-professional jeweller, on a rock-collecting trip to Arkansas. They had a fine time, finding plenty of interesting rocks and crystals, sharing a tent, and enjoying each other's company.

And our daughter noticed some pine seedlings, newly sprouted that spring. She's a competent gardener herself, and she brought some back. She gave one to me to see if I could eventually develop it into a bonsai. I potted it up in a small plastic tray (see the picture), using a fairly coarse mix.

By the end of the summer it had matured enough to start producing its needles in bundles - 3 to a bundle, never 2 or 4. That and the fact that the needles are naturally twisted have let me tentatively identify it as a loblolly pine, Pinus taeda. However, Arkansas has four native pine species, so I'm not going to say I'm sure of its species for another couple of years.

It spent the winter under triple-layer shelter, directly on the ground, with my half-hardy specimens. If it is a loblolly, it won't be cold-hardy much below 10 degrees F (-12 C) in a pot, if it is even that cold-resistant. It came thru this winter fine, so the protection it was given must have been adequate. It is now acclimating to the open air. Its terminal buds are elongating and will soon open.
This year's candles getting ready to open.
I suspect the yellow spots on the needles are needle rust, so I've treated the tree with Cleary's 3336F, a systemic fungicide. I will also consult a more experienced pine grower.

I may not live to see this tree developed into a creditable bonsai - loblollies can live well over 200 years. But I'll try to follow Colin Lewis' advice to us older geezers in such a case: "Do it right for posterity!"

Stay tuned for more on my little "gift pine"!

:-)  :-)  :-)

Tuesday, April 14, 2020

Repotting That Ponderosa

     In my last post, I mentioned the yamadori ponderosa that I intended to repot the following day.

I bought this Pinus ponderosa from Andy Smith of Golden Arrow Bonsai last summer. Andy collected it in 2017, and estimated it to be 40 years old at the time of collection. In August 2019 he brought the tree with him when he visited Fort Wayne to lead a B.Y.O.T. workshop (saving me shipping costs, which I much appreciated.) We did the first styling in that workshop. Here are a few pictures.

My new ponderosa as Andy delivered it.
The work in progress.
(The cluttered background in this picture is due to an unavoidable camera angle.)
Finished for the day. You can see Andy Smith in the background, in the blue cap.
The tree spent the winter outdoors but sheltered from the wind, and by early this month the buds were swelling noticeably. However, temperatures were swinging up and down like a roller coaster, with daytime highs often above freezing but nightly lows frequently below. I finally got an almost week-long stretch of mild weather, and before the foliage opened too far for repotting to be safe this spring. Thankful for the opportunity, I went ahead.

Here's the tree before work began. I anticipated that I might have to adjust the planting angle once I saw the nebari. Also, some topmost branches had gotten disarranged when I finagled the tree into my car after the workshop last August.
April 7, 2020. Ready to repot.
The pot, a gift from my friend Dave Burke, is an unglazed ceramic rectangle. An aeration layer of scoria, particles between 6 and 7½ mm in size, is ready in the bottom.
This pot is a little shorter and a little narrower, but also a little deeper, than the pot the tree came in. Volumes are similar.
I've mentioned before, usually to the surprise of friends in this country, that pines and their close relatives are exotic to me. I grew up in the tropics, and tropical rainforest trees are my "default" models, all the way down to my subconscious, of what to expect from trees and shrubs. I've killed more pines and spruces over the years than I care to mention, as I've slowly learned the specifics of how they differ from tropicals and just how they should be handled as a result.

I've learned a lot of those specifics in recent years from Ryan Neil and the Bonsai Mirai live streams. (Unlike me, Ryan grew up surrounded by pines, if I understand correctly.) For one thing, it's finally gotten thru my head that a conifer should be never be fully bare-rooted when repotting. Never. Just halfway. I tried two of Ryan's techniques which I hadn't used before, the first of which has to do with that "bare-rooting only halfway": I carefully removed about half the existing potting mix from a "window" in the approximate center of the root mass and more or less under the base of the tree. Here's a picture from below; you can see light coming thru some gaps between structural roots (red arrows).
The "window" in the original soil mass.
(Ryan Neil refers to the area immediately under the base of a tree as its sin - pronounced "sheen" and only coincidentally written in our alphabet the way it is! He says a healthy root mass in the sin is very important to the tree's long-term health, but I don't yet fully understand why.)

I also used Ryan's anchoring approach - the second of his techniques I tried for the first time - using stainless-steel wire and small wood screws. I think the results were good, but I have no pictures.

As I mentioned in my last post, I decided to use his 1:1:1 mix of  akadama, pumice and scoria; all particles were between 2 and 6 mm. That's a smaller average particle size than Ryan uses for ponderosas, but his location gets 52 inches of rain per year to my 40, so I'm not especially concerned. Also, the new pot is not especially shallow, a factor that helps drainage. Mycorrhizal inoculant was sprinkled over the roots before soil was filled in.
For any who don't recognize them, the pumice is white, the scoria is black and the akadama is tan.
A large back root, which could not be removed now without endangering the tree, forced me to pot the tree farther forward in the pot than I intend it to eventually be. That root will be shortened at the next repotting, when I replace the outer "donut" of soil and leave the sin untouched. I will then also be able to adjust the front a little (clockwise as seen from above). A top dressing of shredded sphagnum finished things off.
That root adds interest, but constrains the planting position. Guy wire is a precaution.
And that's all for this year. I'll fertilize the tree well, adjust some branches next year, and repot again in 2021.
The tree in its new home.
Well, almost all: the spring weather wasn't quite done with me and the tree yet. Tonite our low is forecast to again be below freezing and the cold is supposed to stay around for the next three days. Even a ponderosa's roots shouldn't be exposed to such chill right after repotting. So the tree is now on the ground next to the south wall of our garage, under the overhang of the roof, screened from the prevailing wind, and with the pot and its contents swaddled in a fabric made for cold protection of early-season vegetables.
Tucked in until the weekend.
Ciao for now!

:-)  :-)  :-)

Tuesday, April 7, 2020

Learning More About Akadama

Hard akadama, maximum particle size about 5 mm.
          Since my first blog post about akadama two years ago, I think I can safely say that my understanding of the subject has become a little more nuanced. In particular, I've learned more about akadama use in a climate like mine: temperate, freezing temperatures in winter, 40 inches of precipitation in an average year. (And in spring, a tendency to go from shirtsleeves to sleet within 24 hours!)

In my last post I mentioned that Andrea Wigert and Adam Lavigne, both in Florida, told me that they don't use akadama in their respective planting mixes because it stays too wet in their rainy climate. I decided to seek the input of a bonsai professional in a climate a lot more like mine. So I contacted a man from whom I've already learned a lot, Mark Fields, of Bonsai by Fields LLC in Indianapolis.

I particularly wondered if Mark uses akadama in his planting mix for ponderosa pine (Pinus ponderosa). I have a yamadori ponderosa from Golden Arrow Bonsai that is due for repotting this spring. Ryan Neil, of Bonsai Mirai, recommends akadama very highly, and I had the components to duplicate his ponderosa mix, a 1:1:1 blend of akadama, pumice and scoria. But first, I wanted to get the thoughts of an experienced grower closer to home. A big "Thank you!" to Mark for discussing the question with me in a series of emails. ðŸ˜„

Here is what Mark told me.
  • First, he uses akadama or an akadama blend for everything except ponderosa pines and California junipers. For those species, he substitutes a product called calidama. As I understand it, calidama is a fired-clay product which absorbs water very slowly and releases it very slowly.
  • Mark allows his temperate-zone trees to freeze over the winter, in a cold greenhouse. It's been his experience that akadama goes into winter still holding enough water that, once it freezes, the particles at the surface, exposed to the air, disintegrate into dust by spring. He didn't say so, but I presume that with a dryland species like ponderosa, Mark doesn't want to take a chance on that dust building up over time and clogging the pores of the soil. With other species, he simply tilts the pots up in the spring and brushes off the dust.
  • Akadama particles below the surface, in Mark's observation, retain their structural integrity.

My climate, here in what many call "Michiana", is both a little colder and a little drier than Mark's in Indianapolis. But after reading of the freezing-and-crumbling, I had almost concluded that I had best not use Ryan Neil's ponderosa mix, which is one-third akadama, but devise something myself.

Then I got an unexpected chance to ask Ryan directly whether he has ever had the problem Mark described: that of akadama on the surface freezing and crumbling. (His location does get freezing temperatures in winter.) He answered that he hasn't, and attributes that fact to the use of a top dressing of shredded sphagnum, which acts as a bit of a blanket over the surface particles.
July 24, 2019, after first styling ; provisional front.

So - with great respect for Mark Fields, and great appreciation for his helpfulness and input - I have decided to use Ryan's recipe, that 1:1:1 mix of akadama, scoria and pumice. I admit I made the decision with some trepidation! And if the tree should suffer as a result, the responsibility is of course mine alone.

Repotting is set for tomorrow morning, once the anticipated rain clears out. The tree is ready, the mix is ready, the pot is ready, and I'm ready. I'll let you all know how it goes in a future post. Here's the tree, after first styling in a workshop with Andy Smith last summer.

(To see my earlier post about akadama, click here.)

:-)  :-)  :-)

Saturday, February 8, 2020

A Visit to Wigert's Bonsai

     One of our older girls and her husband, Kira and Trent, flew my wife Princene, our youngest NaevEnya, and me to south Florida for a few days as a Christmas gift. While there, we were able to visit Wigert's Bonsai, about a 30-minute drive away. I'd already gotten one tree from Wigert's online store. Now I was able to see the place in person!

Wigert's Bonsai raises and sells tropical species for bonsai, as well as some trees that aren't strictly tropical but still grow well in their area. They offer a tremendous selection: I saw well over a dozen species and varieties of Ficus, as well as Fukien tea, Florida buttonwood, sea grape, bougainvillea (with half-a-dozen different bract colors), tamarind, gumbo-limbo (Bursera), podocarpus, bald cypress, Chinese elm, Brazilian raintree, parrot's-beak, sageretia, Premna (popular in southeast Asia), Barbados cherry, and, and, and - you get the idea. I even saw Ceiba, or kapok, which I knew from my boyhood in Ecuador, each trunk covered in stout pyramidal thorns.

Their display of prebonsai and partially-shaped stock probably covers more than 2 acres. Here are a few pictures:

Partly-shaped bonsai-to-be beside a Casuarina tree near their store.

Florida buttonwood (Conocarpus erectus), some of them collected.
I joked to the family that they could leave me here and come back in 2-3 days!
Erik and Andrea Wigert own and operate the nursery together, and have their own collection of bonsai. Some of their trees are simply stunning. Here are some more pictures. A few of their own trees are kept by their koi pond ...

This buttonwood (which I presume is a yamadori) is one of their finest bonsai.
You can see my wife in the background, holding her own camera.
Each trunk of this bougainvillea clump is as thick as a man's thigh.
The pot is - literally - the size of a small bathtub. 
.. and the rest of their own trees are in a gravelled area near their house.
I told NaevEnya that this Ficus salicaria was the tree I "would be most tempted to steal!" <wink>
(Forgive the "photobomb" by the power pole in the background.)
Princene, NaevEnya and me beside that Ficus salicaria (willow-leaf fig).
A collected buttonwood. You can see how well the species works for jin and shari.
I got the impression that Erik is the grower, the "behind the scenes" partner, while Andrea handles the store and is usually the one to talk to visitors. I asked her whether they use akadama in their planting mix, and she immediately answered "No." In their rainy climate, she told me, it simply stays too wet. That matches what I've been told by Adam Lavigne, who practices and teaches bonsai not that far away in central Florida. (He in fact refers to it as "aquadama.") Andrea showed me their mix: a coarse blend of scoria, composted bark, and what she called an "expanded clay product," which she said holds no water. It felt to me like a lightweight pebble.

Our son-in-law Trent, chauffeur to us all, is also interested in bonsai and was ready to get his first tools. Wigert's store prices are quite reasonable, and I recommended a few items to start with, such as concave cutters. The Wigerts also offer a schedule of classes, which he hopes to take advantage of.

Ever since I read some things that Jerry Meislik had to say about Ficus rubiginosa, the Port Jackson or rusty fig, I've been interested in getting one. But I wanted to see one "in person" first, before I took it on. When I mentioned my interest in Port Jackson fig, the family members with me offered to help search the display area for specimens. I gave them the scientific and common names again. Then, as we were all about to scatter over more than two acres packed with prebonsai trees, I happened to glance down at the sign identifying the trees beside - right beside - which I was standing. You guessed it - "Port Jackson fig!"

Trent and Kira kindly bought me a Port Jackson fig as another Christmas present, and the airline and TSA kindly let me bring it home on the plane. Here's a picture taken after I got it home.
My Ficus rubiginosa; you can see why one of the common names is "rusty fig".
The pot is 8 inches across (about 20½ cm); base of the main trunk just over an inch in diameter.
Thanks for everything, Trent and Kira!

For a link to Wigert's website, see the sidebar. 

(For any regular readers who have wondered at my 6-month silence on this blog, various health issues, mainly related to the passing of time, have been largely responsible. I hope to resume writing often enough for it to be worth your while to read - assuming you consider it worth your while in the first place!)


:-)  :-)  :-)


Saturday, August 31, 2019

Amphibians!

     Ecological scientists tell us that amphibians, such as frogs, toads and salamanders, are much like the proverbial canary in the coal mine: they give early warning. If there is an ecological problem, those creatures are affected  before almost any other animals. If they start disappearing, you know something is wrong in the local ecology. Conversely, a healthy population of amphibians in a given area means the local ecology is healthy, too.

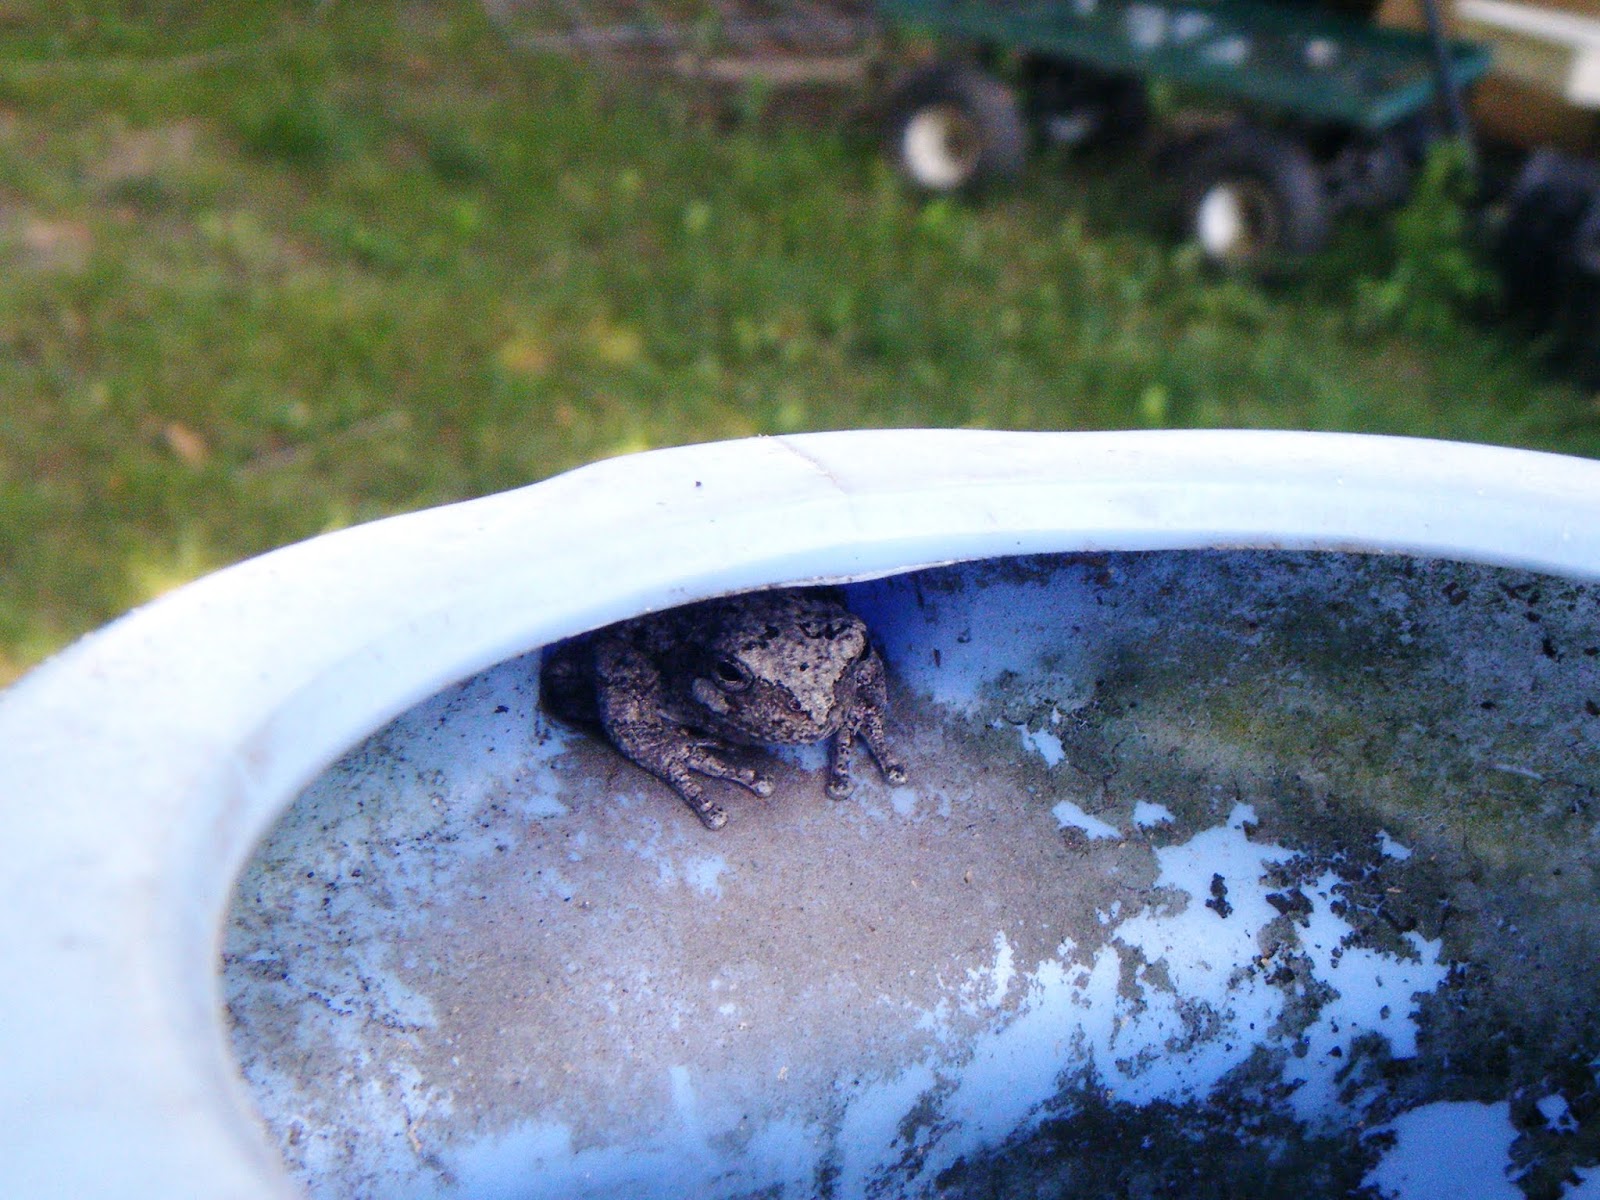
So I am pleased to see the number of frogs, mainly tree frogs, that we have around Dandelion Acres (my wife's provisional name for our homestead). A few weeks ago I discovered that one had decided that the hollow handle of my plastic watering can would be a good hiding spot as he (she?) lay in wait for insects.

Its natural camouflage does blend in a little with the algae spots in my watering can.
Then the critter detected my presence.

Braced to skedaddle.
I encouraged it to find another ambush spot with a few taps on the side of the can, and it took off.

Then this afternoon I noticed another frog trying to blend in on the bark of a ponderosa pine in development.

Its color does blend in with the green of the needles a bit, but the brown of the bark is another matter.
We also see them hopping across the parking apron, evading our dogs and the neighbors' cats, and moving thru the grass. Earlier in the season they gave a nightly concert from our above-ground pool. (Which the local green herons seemed to regard as their own smorgasbord.)

Wherever they are, I always like to see that our ecological "coal mine" has healthy "canaries".

:-)  :-)  :-)