Welcome to my bonsai blog!


Welcome to my bonsai blog!

Look around! Use the Search box, browse the Archive, and leave comments. Click on any picture to enlarge it.
I would be honored to have you follow my posts. There are two ways to do that.
-- If you have your own blog, use Join this site
to have notifications of my posts sent to your blog's reading list.
-- If you don't have a blog,
use Follow by Email: new-post alerts will be sent to your email address. Pictures aren't included; that's just how Blogger does it. For the pictures you come here! ☺
Fora and vendors that I can recommend from experience are listed in the right sidebar.
For more about the ads, and just why I enabled them, please see "About the ads," below.
"And the LORD God made ... trees that were pleasing to the eye ..." Gen. 2:9, New International Version.

"Bonsai isn't just something I do; it's part of what I am." Remark to my wife and daughter.

Wednesday, April 5, 2017

Dog Dishes As Training Pots

(With apologies to Snoopy.)

     I'm like most bonsaiists who work with a limited budget, I think: I'm always on the lookout for new ideas for inexpensive training pots. A year or so ago I found another kind of container that fills the bill quite nicely: rigid plastic dog dishes.

The dishes I found at a major chain discount store are round, 9 inches (almost 23 cm) in internal diameter and just over 3 inches (7-1/2 cm) deep; a perfect size for many small-to-medium bonsai-in-training. I got them for around $10 apiece, and they'll last thru years of repeated use.

The dark material in the center is glue from the label; I couldn't get all of it off.

The plastic is not as rigid as metal, but it is rigid enough to not flex with ordinary handling. For any who don't know, that's important because if the walls of a container flex very much, the soil inside flexes and shifts. When the soil flexes, the roots are flexed as well. And - here's the reason it matters - roots, unlike branches, aren't made to take much bending. Finer, not-yet-lignified roots in particular - including the all-important feeder roots - break easily with any motion of the soil.

(I used to use flexible plastic containers, such as dishpans and oil drain pans, as growing and training containers because they're inexpensive. At a workshop with Kathy Shaner in 2006, I realized that a training container with flexible walls and bottom is not a good idea, and why it's not. No more plastic dishpans!)

A homeowner's cordless drill works fine for creating the holes. I used a 3/32-inch bit for the small holes, and a 1-inch wood bit for the drain holes.

(Yes, I need to clean the rust off the bit. It still did its job.)

Three 1-inch drainage holes should be fine.
The small holes in clusters of three, running around the circumference of the pot roughly an inch below the rim, are there to encourage air-pruning. Any small root that grows into one of those holes will emerge into the open air, and its tip will dry out and die. The rootlet will respond in two ways: it will seal off the dead tip, which will keep out pathogens; and it will branch further back along its length, within the soil. The more that happens, the more of a compact root system the tree will have.

Its marks don't show in the picture, but I also used a rotating wire brush to rough up the inner surface of the walls. A rougher surface will both give the roots something more to grip, and encourage them to branch a little more.

Inexpensive stick-on plastic "bumpers" do a very adequate job as feet, to keep too much water from collecting under the pot. They cost under $3 at a local DIY store.

You can also see the holes for tie-in wires, which don't show up well in the previous picture.

I leave you with a picture of this training container with its new (as of yesterday) occupant: a shohin-sized yew bonsai-in-training!
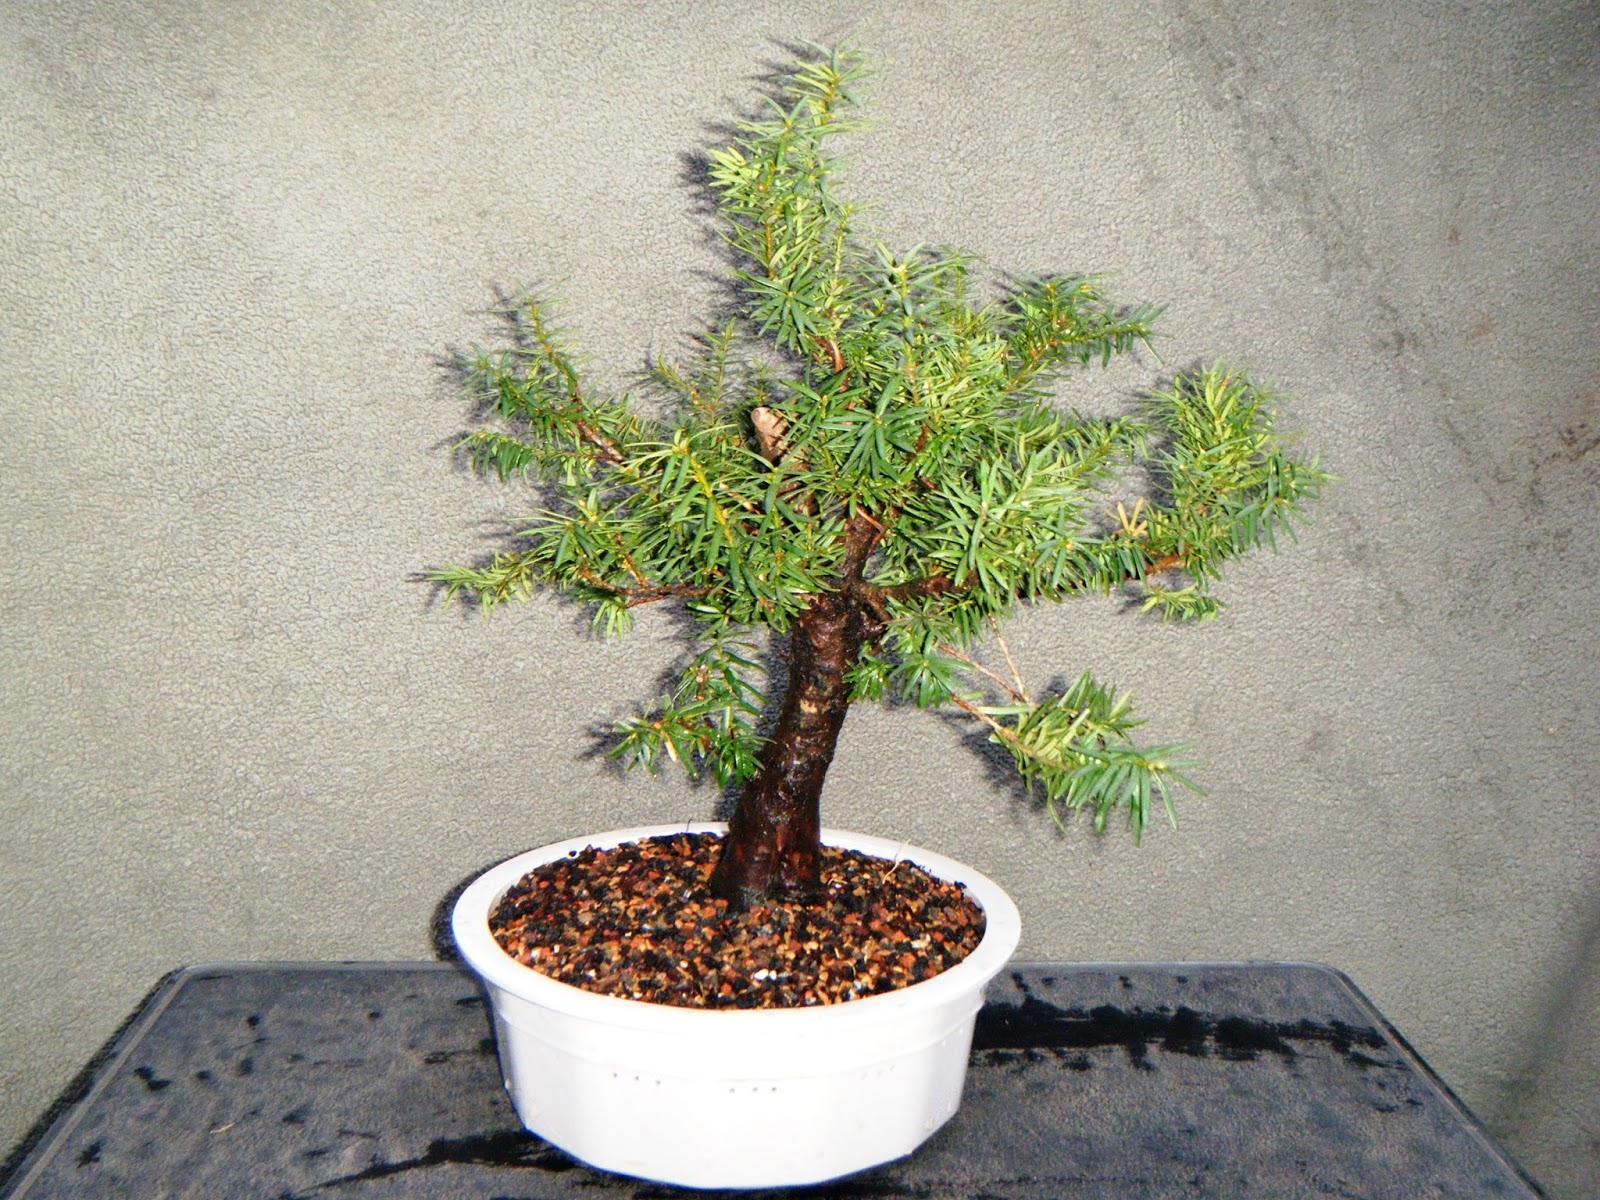
Taxus x media 'Densiformis'. After two years in this container, it should ready for a permanent pot.

:-)  :-)  :-)

Sunday, February 26, 2017

Enjoying New Leaves - But Not Spring Leaves

     About a month ago, this parrot's-beak (Gmelina philippensis) was exposed to temperatures a little below freezing for a number of hours, after I put too much confidence in the overnite weather forecast. The species is tropical. The tree itself survived, but all its leaves were frost-nipped and lost.

New leaves have been coming in - I was quite relieved when the first ones appeared - and I find their fresh light- and medium-green color quite enjoyable!  It's like a foretaste of spring; but under false pretenses, one might almost say, since this species doesn't normally shed its leaves every year.

Parrot's-beak (Gmelina philippensis). Picture taken yesterday under a porch roof.
Picture taken today in late afternoon, open sky overhead.
A closer look, to see more shades of green
Gmelina philippensis (the initial G is silent) is native from the Philippine Islands westward to India. In its native range it sometimes grows as a woody climber, as does bougainvillea. Also like bougainvillea, it is spiny, tho the spines are small and I have yet to have one break the skin. The yellow flowers resemble parrots' beaks, hence the English common name.

I've had this tree for almost 6 years now. It's been doing well in medium-grade bonsai soil and with medium water; it seems to do best in full sun at my latitude (just over 41° North.) The species has been described as "leaf-dense," and I've found that accurate. That makes it easy to shape an attractive canopy. On the other hand, the thin bark wounds easily and any wound seems to take half of forever to heal over. Clip-and-grow seems to be the best technique for shaping parrot's-beak, with wire used only with considerable care and vigilance.

:-)  :-)  :-)

Monday, January 2, 2017

An Image to Inspire a Bonsai

     One of the Christmas gifts that my lovely wife gave me this year was a calendar simply titled "Trees." Each month's picture is of a tree, or trees, from one view or another. I've always found trees interesting, a big factor, I'm sure, in my love of bonsai.

Several of the pictures show trees that are good models for bonsai; here is one of those.

Photo credit to TF Publishing. No copyright restrictions found.
This a birch; if I had to guess, I'd guess a paper birch (Betula papyrifera.) But while I can't be sure of the tree's species, I am sure it offers a great deal of visual interest in its lines and form. Here's an image on which to base a bonsai: strong, well-rooted, well developed, thriving, mature.

The late John Naka, in his well-known Bonsai Techniques, included a number of pictures of trees, each tree's picture paired with the sketch for a bonsai which he had developed from that picture. It's worth noting that, more than once, he ignored an accepted design rule or two in order to stay faithful to the living tree's image.

Besides demonstrating a very useful technique with those pictures and the derived drawings, Naka gave his readers a non-verbal reminder: the art of bonsai is about trees, and tree images. One of the pithy sayings for which he was known puts it another way: "One trip to the mountains is worth 10 workshops!"

My wife knows me pretty well. Along with this calendar, she also gave me an Ansel Adams (Ansel Adams!) print of a snow-covered apple orchard. Thanks, sweetie! 💕

:-)  :-)  :-)

Sunday, November 13, 2016

A Grafting Tip

(Readers who receive the Fort Wayne Bonsai Club newsletter will see this in the current issue in slightly different form.)

     During the Exhibit Critique at the 2016 Mid-America show, Colin Lewis described a grafting technique that gets around one of the common difficulties encountered in grafting. That difficulty is making sure that the cambium of the scion and the cambium of the stock line up with each other at all (or almost all) points. Until your eye has been trained by some experience, making sure that the cambium layers line up all around can be a very frustrating affair.

The technique Lewis shared abandons any attempt to make the cambium line up all around in exchange for eight guaranteed points of cambium-to-cambium contact. Let me try to explain the method, using some twigs cut from the ash tree in our front yard for the purpose. (In case anyone wonders, the intent of this post is to explain and illustrate the concept, not record an actual graft.) 

Step 1. The first step is to trim the scion flat on one side. The cut needs to be as smooth as possible. Then turn the scion over and trim the opposite side in the same way. The surfaces of the trimmed areas need to be as close to parallel as possible.

The green arrows point to the cambium, the thin green layer between the brown of the bark and the off-white of the sapwood.
The chartreuse arrow points to the foliage end of the scion.

This technique, by the way, can be used equally well when a seedling or rooted cutting is being grafted in and its own roots are being retained until the graft takes. You just trim down into the sapwood on opposite sides, as illustrated, at the point on the scion where you want it to contact the stock. Make the trimmed-down area just slightly wider than the flap bed (the exposed area of cambium and sapwood on the stock; see picture 2.)

Step 2. Cut the flap in the stock.

Again, the green arrows point to the cambium, the chartreuse toward the foliage.

Step 3. If the scion is thin enough after trimming, you can skip step 3. But if the scion is thick enough that you won’t be able to close the flap properly, you need a notch, no wider than the scion and just deep enough that the upper surface of the scion lies flush, or nearly flush, with the top of the notch. Note the red arrow! If I had actually been making a graft, rather than simply trying to illustrate a technique, I would not have left the floor of the notch so rough. For an actual graft, it needs to be smooth and flat.

Do not leave the floor of the notch rough like this.

By the way, you can make the notch at any angle you choose, depending on the angle of growth you want the new branch to take. Handy, huh?


Step 4. When you lay the scion in the notch, the line of cambium on each side is going to cross each of the lines of cambium in the stock. That gives you four firm points of cambium-to-cambium contact, two on each side of the scion on its underside. 

Each of the green circles sits above a point of cambium-to-cambium contact on the underside of the scion.

Step 5. The underside of the flap also has two longitudinal lines of cambium, and when you close the flap, each of them is going to come into contact with each of the two cambium lines on the upper side of the scion. This gives you four more points of cambium-to-cambium contact.

You now have four cambium-to-cambium points of contact on the underside of the scion, and four on the upper side, for a total of eight. This is enough for a good join.

Again, each green circle sits above a cambium-to-cambium contact point on the upper side of the scion,
as well as one on the underside.
It's important that the flap lie flat or nearly so, so that cambium-to-cambium contact can be re-established between the flap and its bed. Otherwise, you risk some dieback and an unsightly wound.

(Don't forget that when you make an actual graft, there are other things to consider as well: a very sharp knife and good aftercare, to name just two.)

Lewis pointed out another benefit of this technique: Sometimes the stock branch is intended to be cut off after the graft takes, and the scion is intended to take over. In that event, you’ve introduced some movement into the eventual finished branch in the process of making your graft!

:-)  :-)  :-)