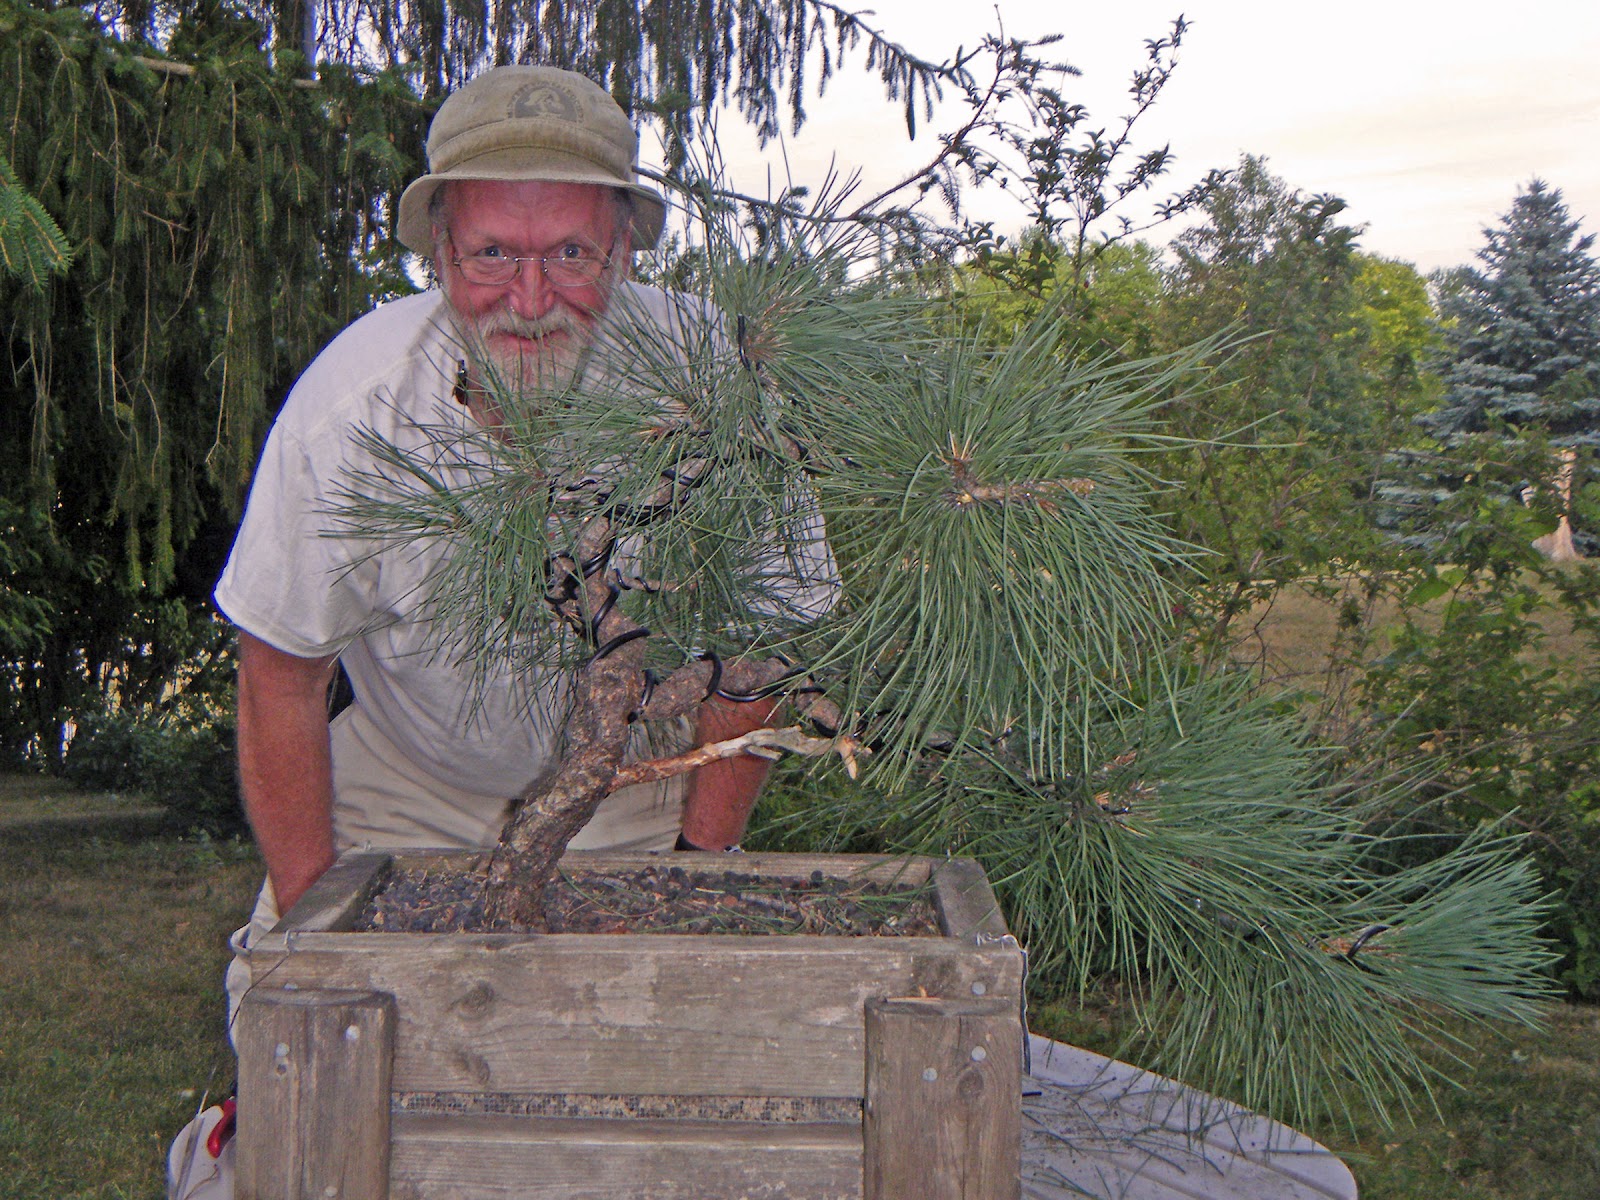
I admit it: I was as excited as a little kid about last week's Styling and Refinement workshop with Andy Smith! (See Part 1.) The tree I took is a ponderosa pine,
Pinus ponderosa, that I bought in Andy's Burlap Bonanza in 2010. (A bit of trivia: at the workshop, I was the only one working on a ponderosa that Andy had
not brought with him on this trip.) Since receiving the tree in April 2010, I've done almost no pruning or pinching. My focus has been on building up my pine's health, and helping it acclimate to a moister climate and a significantly lower elevation than what it had known. When it produced strobili this spring (see
this post,) I knew it was vigorous enough for its first major styling.
 |
| Wednesday morning, June 13th. Ready for the workshop. |
The light-green arrow in the first picture points to a primary branch that died long before this pine was collected. I definitely wanted to keep that branch, and jin it to be a feature of the tree. But I expected to style the tree as a semi-cascade, and it seemed likely that branch would have to be bent down, to harmonize with the rest of the design.
 |
| Branch cleaned off and folded towel in position. |
 |
| Attempting re-hydration of the future jin. |
Nineteenth-century shipbuilders steamed their beams in kilns, and then were able to bend them to an amazing degree. Thanks to a Pine Study Group session on Bonsai Vault, I knew of a re-hydration technique based on the same principle. The day before the workshop, I cleaned all the remaining bark off the dead branch. Then I put an old bath towel, folded so that it was eight layers thick, on the soil surface to protect the roots. A discarded child's T-shirt was wrapped around the branch, and boiling water was then poured on the T-shirt. I kept applying more boiling water at frequent intervals, re-folding the bath towel when necessary to keep scalding-hot water off the roots. The idea was, essentially, to steam the wood, making the branch flexible enough to be wired and bent into a new position.
Did the branch become as flexible as I wanted? The question turned out to be moot. Andy didn't think the branch needed to be re-positioned to work with a semi-cascade, and after seeing how things developed, I decided he was right. But I did get to try out a technique new to me!
 |
| (In spite of appearances, I'm not really afraid of cameras.) |
As it happened, my tree was one of the last on Andy's circuit, and by the time he got to me, I think he felt bad about how long I had waited. He offered to help me wire, and I gladly accepted. But I quickly discovered that it doesn't work well to have two men trying to wire the same tree when it's on a turntable! I don't usually leave such gaps in my wiring!
I had to leave early. My fourth picture shows how much was done by the time I left.
I finished the styling at home over the next two days. I decided to change a few things that Andy had done, after I studied the tree further. Some teachers react badly if one of their recommendations is turned down, but Andy Smith is not one of those. Had I brought up my opinions while still at the workshop, he would have accepted them readily. ("Hey, it's your tree.")
Here's a picture of my ponderosa now. The wires will remain for at least two years: ponderosa pine is notorious for reverting to old shapes once wire is removed.
 |
| Styling finished for the present. This is the front. |
 |
| A view from the back. |
The tree will spend a week in semi-shade, then go back into the sunniest spot I can provide. Over the next two years it will be fertilized generously: first, to help it recover from the trauma of being seriously worked; and second, to give it the wherewithal to accrete new wood on the repositioned branches. For any who don't know, that new wood is what will hold them in place.
As the tree fills out further, I also want to compact the foliage, enough to fit more or less into the green outline in the virt below. A classic semi-cascade seems to be the design that fits this tree best.
Next spring it will be repotted and more of the native soil removed from the roots. It may go back into the same training box at that point; it may go into a permanent pot, if I can obtain one by then.
 |
| A virt of future possibilities. |
The shape of this tree's root system (which is hidden here,) dictates that this tree will always have to be offset almost to the left edge of its container. And the abundant trunk and branch movement calls for a pot with curved lines, not angles. In light of those two facts, I am considering both an oval pot, and the more usual round. (I've already been browsing Sara Rayner's website.)
I've got some time to decide, and I always welcome feedback. Do you have an opinion? Leave me a comment. (Ignore the pot
shape in the virt: I drew the pot in for visual mass, not shape.)
:-) :-) :-)


No comments:
Post a Comment